
So, you need to do a risk assessment. What does that actually mean on the ground?
It’s pretty simple. You find what can harm people, figure out the chances of it happening, and then decide on smart ways to stop it. Then, you actually do those things. This isn't a theoretical exercise; it’s about getting safety right on a busy construction site or a noisy factory floor.
Why Practical Risk Assessments Are Non-Negotiable
A proper risk assessment is the foundation of a safe workplace. It’s not just paperwork. It's a hands-on process for preventing serious injuries and keeping your projects from grinding to a halt.
When you skip this step or just treat it like a box-ticking exercise, you’re exposing your people to real danger and your business to serious legal and financial heat.
The whole point is to walk through a worksite and identify what could cause harm. Let's take a welder working on a scaffold. The obvious hazard is sparks. But a practical assessment goes deeper. What about the height? Is the platform stable? Are there leads creating a trip hazard? What about fumes, especially if they're in a confined area? You have to look at all these moving parts together.
To get you started, here’s a quick overview of the core process. Think of it as a simple roadmap for everything we're about to cover.
The Core Risk Assessment Process at a Glance
| Stage | What It Means | Why It Matters |
|---|---|---|
| 1. Define Scope | Deciding exactly what you're assessing: a specific task, machine, or entire work area. | Prevents the assessment from becoming too broad or missing critical details. Focus is key. |
| 2. Identify Hazards | Walking the site, talking to workers, and listing everything with the potential to cause harm. | You can't control a risk you haven't identified. This is the foundation of the entire process. |
| 3. Assess Risk | Evaluating the likelihood and potential severity of harm for each hazard identified. | Helps you prioritise the most serious risks so you can tackle the biggest dangers first. |
| 4. Decide & Record Controls | Brainstorming and documenting practical measures to eliminate or reduce each risk. | Creates a clear action plan. If it isn't written down, it's easy for it to be forgotten. |
| 5. Implement & Communicate | Putting the controls in place and making sure everyone involved knows what they are and why they matter. | A plan is useless until it's put into action. Clear communication ensures everyone is on board. |
| 6. Monitor & Review | Regularly checking that the controls are working and updating the assessment when things change. | Workplaces are dynamic. This ensures your safety measures stay relevant and effective over time. |
This table gives you the 'what,' but the 'why' is what truly matters. We’ll break down each of these stages with practical steps and real-world examples in the sections below.
The Real-World Impact on Safety
The ultimate goal here is simple: stop accidents before they happen.
An effective risk assessment is your best tool for tackling the most common and severe incidents head-on. Just look at the data. Australia's latest work-related injury stats show that 80% of traumatic fatalities and 61% of serious compensation claims happen in just six industries, including Construction and Manufacturing.
What's causing them? Vehicle incidents and falls from height are right at the top of the list. This isn't just a statistic; it’s a clear signal telling you exactly where to focus your risk assessment efforts.
Getting this right isn't just about compliance. A well-executed assessment helps you:
- Prevent Injuries: It’s a no-brainer. When you identify and control hazards like exposed wiring or unguarded machinery, you directly reduce the chance of someone getting hurt.
- Avoid Project Delays: An incident can shut down a site for days, even weeks. Proactive risk management is just good business: it keeps the work flowing smoothly.
- Protect Your Business: Demonstrating due diligence with properly documented risk assessments is your best defence against fines and legal trouble.
A risk assessment done from behind a desk is useless. You have to get out on the floor, watch the work being done, and talk to the people who do it every day. That’s where you find the real risks, not in a generic template.
This process is also fundamental for meeting specific technical requirements, like those covered by understanding electrical safety standards like NFPA 70E. Standards like this exist for one reason: because a clear process of identifying, assessing, and controlling risk has been proven, time and again, to save lives.
This guide will walk you through exactly how to build and implement that process yourself.
Getting the Risk Assessment Process Right
Let's get into the heart of it: how do you actually conduct a risk assessment on-site in a way that works? This isn't about ticking boxes or creating perfect-looking documents. It’s about building a solid, repeatable process that genuinely stops people from getting hurt.
When you boil it down, the process is just a logical sequence: find what can go wrong, figure out how bad it could be, and then do something meaningful about it.

Each step naturally flows into the next, giving you a clear path from spotting a potential problem to putting a practical solution in place.
First Things First: Define Your Scope
Before you even think about looking for hazards, you need to be crystal clear on what you’re assessing. Get this wrong, and the whole process can fall apart.
If your scope is too broad, say, "the entire factory," you'll be drowning in minor details and likely miss the critical stuff. But if it’s too narrow, you might fail to see how different tasks or areas interact, creating blind spots.
So, decide upfront if your assessment will cover:
- A specific task or activity: like "welding on the mezzanine" or "operating the new CNC press."
- A particular piece of equipment: such as "the workshop band saw" or "scaffolding rig B."
- A defined work area: for example, "the main loading bay" or "the metal fabrication workshop."
Being specific is the secret sauce. A tight scope keeps your efforts focused and makes the whole exercise manageable. Without it, you’re just wandering around hoping to find something.
Finding Hazards Where They Happen
Once your scope is locked in, it’s time to find the hazards. This is the hands-on part of the job, and you can't do it from behind a desk. You have to get your boots on the ground.
Here are a few straightforward ways to uncover what could go wrong:
- Walk the site. Seriously, just walk through the area you're assessing. Look up, down, and all around. What seems out of place? Are there trailing leads, unstable stacks of materials, or unguarded machines?
- Talk to your team. The people doing the work day in and day out know the real risks better than anyone. Ask them simple questions like, "What’s the sketchiest part of your job?" or "Have there been any near misses here?" Their insights are gold.
- Check your records. Dig into your incident reports, near-miss logs, and any past risk assessments. You'll often find patterns that point to recurring issues that were never properly fixed.
Let's say you're assessing a metal fab shop. A quick walk-through might reveal trailing grinder leads across a walkway, a wobbly stack of steel sheets, and someone working near a noisy press without hearing protection. These are all immediate hazards to jot down.
Assess the Risk With a Simple Matrix
Okay, so you’ve found a hazard. That’s only half the battle. Now you need to work out how serious it really is. This is where you assess the risk by considering two simple factors: the likelihood of an incident happening and the consequence (or severity) if it does.
A risk matrix is the perfect tool for this. It’s a simple grid that plots likelihood against consequence, giving you a clear risk rating: low, medium, or high.
Take that trailing electrical lead. A trip is likely. The consequence could range from a minor stumble to a serious fall causing a broken bone. Plotting this on your matrix quickly shows it’s a medium-to-high risk that needs sorting out fast.
A risk matrix isn't about getting a perfect score. It's a practical tool to help you prioritise. It forces you to think about what could realistically happen and what you should fix first.
This step is absolutely critical for sifting through your list of hazards. A loose handrail on a rarely used platform is probably a lower priority than an unguarded blade on a machine that runs all day. If you want to dig deeper into building and using these grids, our guide on the risk management matrix has more detailed examples.
Decide On and Record Your Controls
Once you know which risks need your attention, it's time to decide what to do about them. This is where you select and document your control measures, and the best way to do this is by following the hierarchy of controls.
This framework is a game-changer because it forces you to prioritise the most effective solutions over the weakest ones.
The hierarchy, from most effective to least, is:
- Elimination: Can you get rid of the hazard completely? (e.g., pre-fabricating a structure at ground level to remove the need for working at height).
- Substitution: Can you swap the hazard for something safer? (e.g., using a water-based paint instead of a toxic, solvent-based one).
- Engineering Controls: Can you physically isolate people from the hazard? (e.g., installing machine guards or a ventilation system).
- Administrative Controls: Can you change the way people work? (e.g., creating safe work procedures, providing training, or using warning signs).
- Personal Protective Equipment (PPE): This is your last line of defence. It includes gear like hard hats, gloves, and safety glasses. It protects the person but does nothing to remove the actual hazard.
Always, always aim to implement controls from as high up the hierarchy as you can. Simply handing out PPE is a classic mistake. It’s the least effective control and should never be your only solution.
The hierarchy of controls isn't just theory; it has very practical applications on any worksite. Here are a few real-world examples to show how it works.
Practical Examples of the Hierarchy of Controls
| Hazard | Elimination/Substitution | Engineering Control | Administrative Control | PPE |
|---|---|---|---|---|
| Welding Fumes in a Confined Space | Redesign the component so it can be welded in an open, well-ventilated workshop. | Install a local exhaust ventilation (LEV) system to capture fumes at the source. | Limit the time workers spend in the space and ensure they are trained on fume risks. | Provide and enforce the use of respiratory protective equipment (RPE). |
| Noise from a Stamping Press | Replace the noisy press with a newer, quieter hydraulic model. | Enclose the machine in a sound-proof booth or install acoustic barriers around it. | Implement a job rotation schedule to limit individual exposure time and post clear warning signs. | Mandate the use of earplugs or earmuffs for anyone entering the area. |
| Manual Handling of Heavy Materials | Automate the process with a conveyor belt or robotic arm to remove manual lifting entirely. | Provide lifting aids like a forklift, crane, or even a simple pallet jack. | Train workers in correct lifting techniques and break down heavy loads into smaller, manageable ones. | Issue steel-toed boots and gloves to protect against dropped items or crush injuries. |
As you can see, for any given hazard, there are multiple layers of protection you can implement, starting with the most effective.
Implement and Communicate the Changes
A perfectly documented risk assessment is completely useless if it just sits in a folder on the shelf. The final and most important steps are to actually implement the controls you’ve decided on and tell everyone what’s changing.
Implementation might mean ordering and fitting a new machine guard, scheduling training sessions on a new safe work procedure, or getting clear signage put up. Set firm deadlines for these actions and make sure someone specific is responsible for seeing each one through.
Communication is just as vital. Run a toolbox talk to explain the new controls and, crucially, the why behind them. Update your Safe Work Method Statements (SWMS). Ensure supervisors know their role in enforcing the new rules.
When your team understands why a change is being made, they are far more likely to get on board. Clear communication is what turns all your hard work into a genuinely safer workplace.
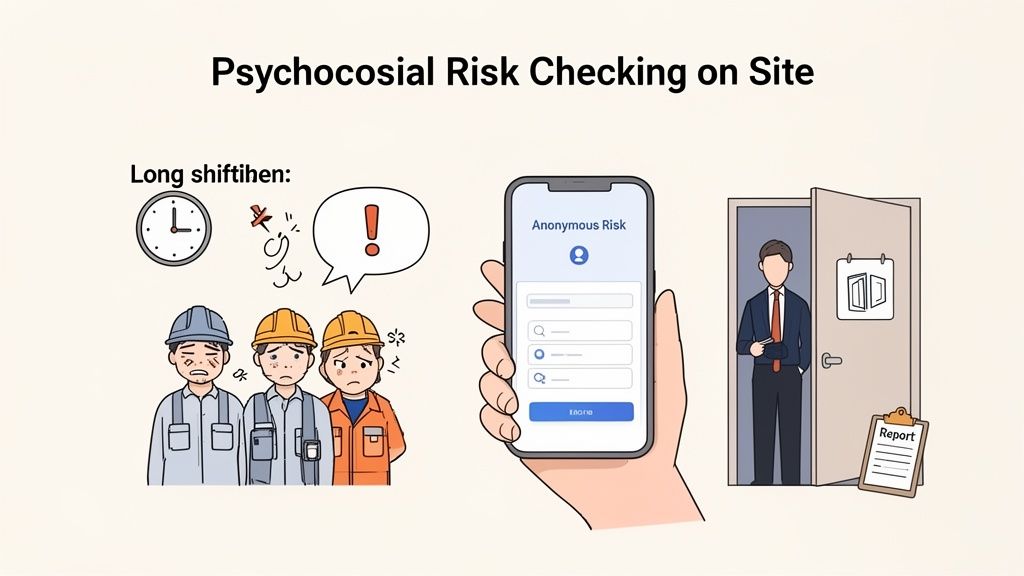
Recognising Psychosocial Risks Beyond Physical Dangers
When we talk about risk assessments, it’s all too easy to fixate on what we can see and touch: the unguarded machine, the trip hazard, or the chemical spill. But a proper, modern assessment has to dig deeper than just the obvious physical dangers. The risks that affect a worker's mental wellbeing, known as psychosocial risks, are just as serious and can have a massive impact on your team and your projects.
These aren't vague concepts. In high-pressure environments like construction and manufacturing, psychosocial hazards are very real. Think of them as the invisible forces that lead to stress, burnout, and serious mental health issues if left unchecked.
What Psychosocial Hazards Look Like on Site
So, what are we actually looking for? Psychosocial risks are born from the way work is designed, managed, and from the social dynamics on site. They often fly under the radar until a serious problem develops.
Here are a few common examples you’ll find on any factory floor or construction site:
- High Workload and Pressure: Constant pressure to hit tight deadlines, which often leads to rushed work and exhaustion.
- Long or Unpredictable Hours: Extended shifts or chaotic schedules that mess with proper rest and recovery, fuelling fatigue.
- Poorly Managed Change: Bringing in new machinery or restructuring teams without clear communication or support for the people affected.
- Low Job Control: Workers having little to no say in how they do their work or the pace they have to keep up.
- Workplace Bullying or Harassment: Toxic interactions between team members, supervisors, or even clients.
- Lack of Support: People feeling isolated or like they have no one to turn to for help from supervisors or colleagues.
Ignoring these issues isn't just bad for morale; it's a massive business risk. The numbers don't lie. Mental health conditions now account for 12% of all serious workers' compensation claims in Australia, a staggering 161% increase over the last decade. On top of that, the median time off work for these claims is nearly five times longer than for physical injuries, showing just how huge the operational and financial fallout can be. You can dive deeper into these Australian workplace safety statistics to get the full picture.
How to Weave These Risks into Your Assessment
Spotting psychosocial hazards needs a different approach than finding a physical one. You can't just walk around with a clipboard ticking boxes. It takes observation, conversation, and a foundation of trust.
A great way to start is by building these checks into your existing risk assessment process.
- Use Anonymous Surveys: People are often hesitant to speak up about stress or bullying. Simple, anonymous surveys can give you brutally honest feedback on workload, management support, and team dynamics.
- Hold Focused Team Discussions: During toolbox talks or safety meetings, ask open-ended questions. Try something like, "What's the most stressful part of the job right now?" or "Are there any communication breakdowns we need to sort out?"
- Observe Team Interactions: Pay attention to how people work together. Is the communication respectful? Are supervisors giving clear instructions and genuine support? Obvious friction or high tension can be a red flag for deeper issues.
You'll learn more about the real pressures on your team by actually listening for 15 minutes than you will from a week of staring at productivity charts. The goal is to create an environment where people feel safe enough to tell you what's really going on.
Putting Controls in Place for Mental Wellbeing
Once you've identified a psychosocial risk, you need to apply controls just as you would for a physical hazard. The hierarchy of controls is still your best friend here, even if the solutions look a bit different.
Let's say your assessment flags extreme fatigue from long shifts as a major risk.
- Engineering/Design Controls: This is about redesigning the work itself. Review and reshape shift schedules to guarantee adequate rest periods. Can you implement rotating schedules that are more predictable and fair?
- Administrative Controls: Here, you're changing processes. Create a clear, firm policy on overtime and ensure it's managed properly, not abused. Train your supervisors to recognise the signs of burnout and fatigue in their teams.
- Supportive Measures: This is your safety net. Establish clear, confidential channels for workers to report issues without any fear of backlash. This could be an open-door policy with a trusted manager or access to an external support service.
By actively including psychosocial factors in how you do a risk assessment, you shift from a reactive, "firefighting" approach to a proactive one. You're not just preventing injuries anymore; you're building a workplace where people can do their best work without it costing them their mental health.
Common Risk Assessment Mistakes and How to Avoid Them
Even with a solid process, it’s far too easy to fall into a few common traps. These pitfalls can make your risk assessment less of a safety tool and more of a box-ticking exercise.
Knowing what these mistakes are is the first step to sidestepping them and making sure your efforts actually keep people safe. These aren't just theoretical problems; they're the practical hurdles managers face every single day. The good news? For every common mistake, there's a straightforward fix. It’s all about shifting from a "paperwork" mindset to a practical, hands-on approach.
The Desk-Based Assessment Mistake
This is probably the biggest and most common mistake of all. A risk assessment completed from the comfort of an office, without ever setting foot on the workshop floor or construction site, is practically useless.
You just can't grasp the real-world pressures, the unofficial shortcuts, or the environmental factors from behind a computer screen.
How to Fix It: Get your boots on. Seriously. Schedule regular, non-negotiable site walks specifically for assessments. Don't just wander around; observe the actual task being performed from start to finish. Watch how people interact with machinery and their environment. This is the only way to see the real risks, not just the ones you imagine on paper.
Using Generic, One-Size-Fits-All Templates
Grabbing a generic template off the internet might feel like a time-saver, but it often leads to a shallow and irrelevant assessment. A template designed for plumbing work won't capture the specific electrical or chemical hazards in a manufacturing plant. It completely misses the context.
How to Fix It: Create a master template, but make it your own. Customise it for different high-risk tasks or areas in your business. While a core structure is fine, you need specific sections for different jobs. For example, your template for "working at height" should look very different from your template for "operating the press brake," with unique prompts for the hazards of each task.
A risk assessment should be a living document that reflects a specific task, done by specific people, in a specific environment. If your assessment for welding looks the same as your assessment for forklift operation, you've missed the point.
Not Involving the Right People
Another critical error is when a manager or safety officer completes the assessment in isolation. The people who perform the task day in and day out have invaluable insights.
They know the unofficial workarounds, the frustrating equipment quirks, and the near misses that never get reported. Leaving them out is like trying to navigate a city with half the map missing.
How to Fix It: Make worker involvement a mandatory step. Before you even start filling out the form, have a brief chat with the team doing the job. Ask simple, open questions like, "What's the trickiest part of this?" or "What worries you most when you're doing this?" Their input will uncover hazards you would never think of on your own.
The "Set and Forget" Approach
Finally, there's the mistake of treating the risk assessment as a one-time task. You complete the paperwork, file it away, and it's never seen again until an auditor comes knocking.
But workplaces are dynamic. New equipment is introduced, procedures change, and people forget things. An outdated assessment isn't just useless; it's dangerous.
How to Fix It: Schedule reviews and bake them into your regular safety process. A good rule of thumb is to review an assessment annually, or immediately after:
- An incident or near miss occurs.
- A new piece of machinery or substance is introduced.
- The work process or location changes significantly.
Treating your assessments as live documents ensures your control measures for risks remain relevant and, most importantly, effective.
Using Digital Tools to Make Risk Assessments Easier
The principles of how you do a risk assessment are solid, but the traditional tools we've used to manage them are anything but. Paper forms, clunky spreadsheets, and endless email chains are slow, inefficient, and create a mountain of administrative work.
Chasing signatures, manually updating logs, and trying to keep track of paperwork from different sites eats up valuable time that should be spent out on the floor or on-site, where safety actually happens. Moving to digital tools isn’t just about looking modern; it’s about making the entire process faster, more accurate, and far more manageable.
It means your team can pull up an assessment on a tablet right in the middle of a job site, flag a hazard using a mobile form on the spot, and trigger instant notifications for any urgent actions. It's a practical leap forward that eliminates some of the biggest administrative headaches in safety management.
Centralised Control Across Multiple Sites
One of the toughest challenges for any growing business is keeping things consistent. A risk assessment process that works perfectly well on one site can completely unravel when you're trying to manage three, five, or even ten different projects at once.
Digital platforms solve this problem by creating a single source of truth. Instead of different versions of forms floating around in various site offices, everyone works from the same set of templates and procedures, period.
This approach brings some immediate, practical benefits:
- Uniformity: You can push updated templates to all sites simultaneously, ensuring everyone is using the most current version. No more outdated forms causing confusion.
- Real-time Oversight: A manager in the head office can see completed assessments from any site the moment they're submitted. No waiting for paperwork to be couriered or scanned.
- Simplified Reporting: Generating reports on incidents or outstanding actions across the whole company takes minutes, not days of manually compiling data from different spreadsheets.
Consistency is key. When your teams on every site are using the same digital process, you stop dealing with endless variations and start getting reliable, comparable safety data you can actually use.
This level of organisation is a core part of effective health and safety compliance software, which is designed specifically to pull all those scattered processes into one manageable system.
Smarter and Faster Form Completion
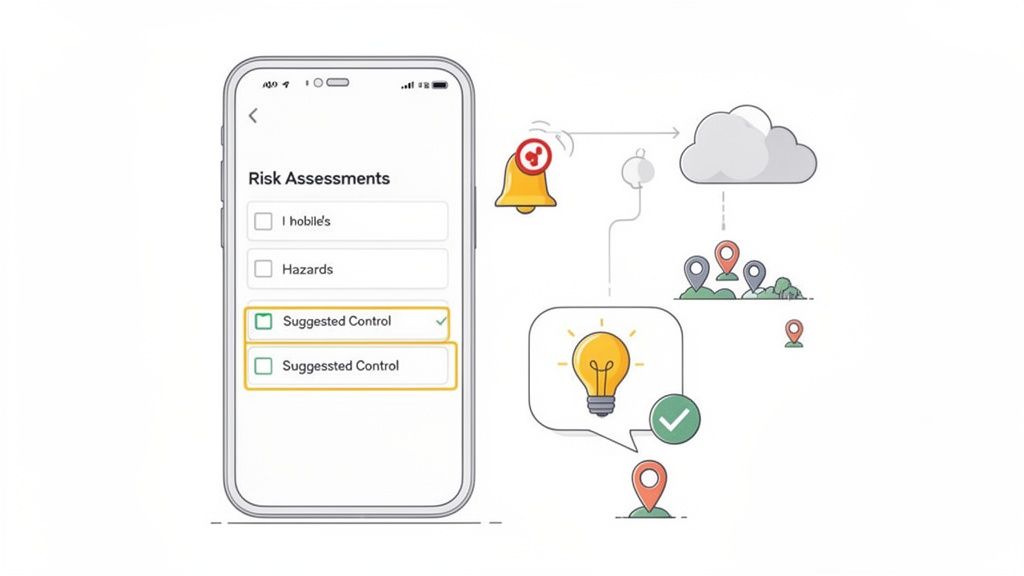
Good digital tools do more than just get rid of paper; they make the assessment process itself smarter. Imagine starting a risk assessment for a common task, like operating an angle grinder, and having the form instantly pre-populate with the usual hazards and effective controls based on hundreds of previous assessments.
This is where AI-assisted forms come into play. They act as a helpful guide for the person doing the assessment, suggesting potential risks they might have overlooked. For example, when assessing a "working at height" task, the system might automatically prompt the user to consider:
- Leading edge protection
- Falling objects
- Weather conditions
- Rescue procedures
This simple feature helps standardise the quality of your risk assessments, ensuring that even less experienced supervisors don't miss critical safety checks. It takes some of the mental load off your team, letting them focus on the unique conditions of their specific job site.
To improve efficiency even further, it’s worth exploring the best workflow automation tools that can handle even more of your operational needs. By automating repetitive admin tasks, your team can dedicate more time to critical safety management on the ground, where it counts the most.
A Few Common Questions About Risk Assessments
When you're out on the floor trying to get risk assessments right, the same questions tend to pop up. Let's tackle the most common ones with some straight, practical answers.
How Often Should I Review a Risk Assessment?
A risk assessment isn't a "set and forget" document. Your workplace is a living, breathing thing, and your assessment has to keep pace. While you don't need to pore over it daily, you absolutely must pull it out and give it a proper review whenever something significant changes.
Think of these as your non-negotiable triggers:
- A new bit of kit arrives: That new press, CNC machine, or welding unit brings its own set of hazards that your old assessment won't cover.
- An incident or a near-miss occurs: This is the most obvious red flag. It’s a real-world signal that your controls either failed or missed something critical.
- Procedures or materials are changed: Swapping to a new chemical, tweaking a manufacturing process, or even just changing the workflow can introduce entirely new risks.
- The rules of the game change: New legislation or updated industry standards might demand different, often stricter, controls than what you have in place.
Even if your operations are stable and none of these events happen, make it a habit to schedule a formal review at least once a year. It’s the only way to be sure your safety measures haven't quietly become obsolete.
Who Should Be Involved in a Risk Assessment?
Trying to conduct a risk assessment from the quiet of an office is one of the biggest mistakes you can make. You just can't get the full picture on your own. For an assessment to be worth the paper it's written on, you need a small, focused team of people who see the task from different angles.
This isn't about calling a big meeting for the sake of it; it's about genuine collaboration. Your A-team should always include:
- The Person Actually Doing the Work: No one understands the hidden quirks, the unofficial shortcuts, and the real-world pressures of a job better than the operator or tradesperson doing it day in, day out. Their input is essential.
- Their Direct Supervisor: The supervisor knows the production targets, the team dynamics, and how this one task slots into the bigger operational picture.
- A Safety Representative or Manager: This person provides the formal expertise on regulations, hazard identification methods, and best practices for controls.
When you bring these three viewpoints together, you get something that’s both compliant and practical. The operator points out a subtle machine vibration, the supervisor explains how it affects the afternoon shift, and the safety rep helps document it and find a workable solution.
A hazard is a thing. A risk is what that thing can do to someone. Nailing this distinction is the foundation of a good assessment.
What's the Difference Between a Hazard and a Risk?
People mix these two up all the time, but in the world of workplace safety, they mean very different things. Getting it right is crucial because it shapes your entire approach.
Here’s the simplest way to think about it:
- A hazard is the thing with the potential to cause harm.
- A risk is the likelihood of that harm actually happening, combined with how bad the outcome could be.
Let's use a simple workshop example. A puddle of oil on the floor is the hazard. The risk is that a worker could slip, fall, and suffer a serious injury like a fractured wrist. The hazard is the source; the risk is the probability and the consequence.
Ready to move beyond paper and spreadsheets? Safety Space provides a single, easy-to-use platform to manage all your risk assessments, from on-the-spot hazard reporting to multi-site compliance oversight. See how you can make your safety processes faster and smarter with a free demo.
Ready to Transform Your Safety Management?
Discover how Safety Space can help you implement the strategies discussed in this article.
Explore Safety Space FeaturesRelated Topics
Safety Space Features
Explore all the AI-powered features that make Safety Space the complete workplace safety solution.
Articles & Resources
Explore our complete collection of workplace safety articles, tools, and resources.